


Reproducible Development Environments in Any Repo with AI Agents and Flox: Part 2
On your own or with an assist from agentic AI, it’s shockingly simple to migrate your software projects into portable, reproducible Flox environments. This article tests that hypothesis by attempting to “Floxify” two real public repos: Node-RED and n8n. In the era of agentic AI, is Floxifying these projects as simple as prompting:
Turn this repo into a Flox environment so my teammates and I can run it anywhere at any time. Please.The short answer is … Yes, it can! This article walks you through how to Floxify virtually any project/anywhere. It’s actually a complete rewrite of an older article, drafted before Anthropic’s Claude Code, Google’s Gemini CLI, OpenAI’s Codex, and most other GenAI-powered coding agents even existed. Spoiler alert: Today, with an AI assistant doing the work, Floxifying most any project repo takes just a few minutes.
But why Floxify anything? Let’s count the reasons!
- Reproducibility and auditability. Floxifying a repo pins its build-time or runtime dependencies, so you (or an AI agent) can always rebuild, run, and debug it in a known-good state—on any machine, at any time.
- Safe, isolated experimentation. You can clone and run third-party projects without polluting your system Python/Node/Cxx. Everything runs in an isolated Flox environment that you can discard at will.
- Use one environment across the entire SDLC. The same manifest that powers local dev also defines the runtime for CI jobs, containers, Uncontained workloads on Kubernetes, and serverless targets.
- Work on your local machine. Flox environments run on your local system, not in hermetically sealed containers, so you get directly access to all your files, data, secrets, aliases, and environment variables.
- Platform-optimized packages. When you run Flox environments on macOS, you get binaries and libraries optimized for macOS. Flox environments are portable/cross-platform by default, running on macOS and Linux (including Windows with WSL2), on x86 and ARM, on CUDA or Apple Metal GPUs.
- Perfect for agentic development. Flox is a cross-language package + environment manager, so AI coding assistants can fetch everything they need from just one place: the Flox Catalog, which includes both millions of open source package-version combinations and (optionally) your org’s own private software.
The best part is that there’s almost no heavy-lifting involved, especially when you’re working with AI agents.
Intrigued? Great! Let’s put our hypothesis to the test.
Floxifying Node-RED
We’ll start with Node-RED, a flow-based development tool useful for wiring together hardware devices, APIs, and services via a browser-based visual editor.
For this walkthrough, we’ll use Claude Code. The n8n walkthrough (see below) will use Google Gemini CLI.
First let’s fire up Claude Code, in this case by activating a remote FloxHub environment. If we run it with the time command, we can see how long it takes Claude Code to Floxify this repo.
$ time flox activate -r floxrox/claude-code
╭───────────────────────────────────────────────────╮
│ ✻ Welcome to Claude Code!                         │
│                                                   │
│   /help for help, /status for your current setup  │
│                                                   │
│   cwd: /home/daedalus/dev                         │
╰───────────────────────────────────────────────────╯

 Tips for getting started:

  Run /init to create a CLAUDE.md file with instructions for Claude
───────────────────────────────────────────────────────────────
> Try "edit <filepath> to..."
───────────────────────────────────────────────────────────────
You can easily alias this command to the runtime command’s name (e.g., claude), or as I do, to a mnemonically similar command, like klaude. The neat thing about remotely activating a FloxHub environment is that you can run it on-demand—i.e., without cloning it to a repo on your local system.
> Clone node-red’s GitHub repo and turn it into a Flox environment that my teammates and I can run anywhere at any time. Please.

● I'll help you clone the Node-RED GitHub repository and set it up with a Flox environment for reproducible development across your team.
This takes Claude (checks notes) just a few minutes:
● ✅ I've successfully created a Flox environment for Node-RED that you and your teammates can use anywhere. Here's what's been set up:

  📁 Location

  /home/daedalus/dev/test/node-red/

  🚀 Quick Usage

  cd node-red
  flox activate        # Enter environment & install deps
  flox services start            # Start Node-RED

  Or run as a service:
  flox activate -s    # Start Node-RED in background

  Just commit the .flox directory to your repo. Anyone who clones it can run flox activate to get the exact same Node-RED environment - no Docker, no VMs, works on Linux and macOS.

  The environment is fully tested and Node-RED starts successfully!
How long, exactly, did Claude Code elucubrating and prestidigitating this into existence?
real    4m06.061s
user    1m01.797s
sys     0m4.391s
Let’s first check the status of the node-red service to make sure it’s actually running:
$ flox services logs node-red
Your flow credentials file is encrypted using a system-generated key.

If the system-generated key is lost for any reason, your credentials
file will not be recoverable, you will have to delete it and re-enter
your credentials.

You should set your own key using the 'credentialSecret' option in
your settings file. Node-RED will then re-encrypt your credentials
file using your chosen key the next time you deploy a change.
---------------------------------------------------------------------

9 Dec 15:43:12 - [warn] Encrypted credentials not found
9 Dec 15:43:12 - [info] Server now running at http://127.0.0.1:1880/
9 Dec 15:43:12 - [info] Starting flows
9 Dec 15:43:12 - [info] Started flows
It … looks as if it’s working. Of course the true proof is in the screenshot.
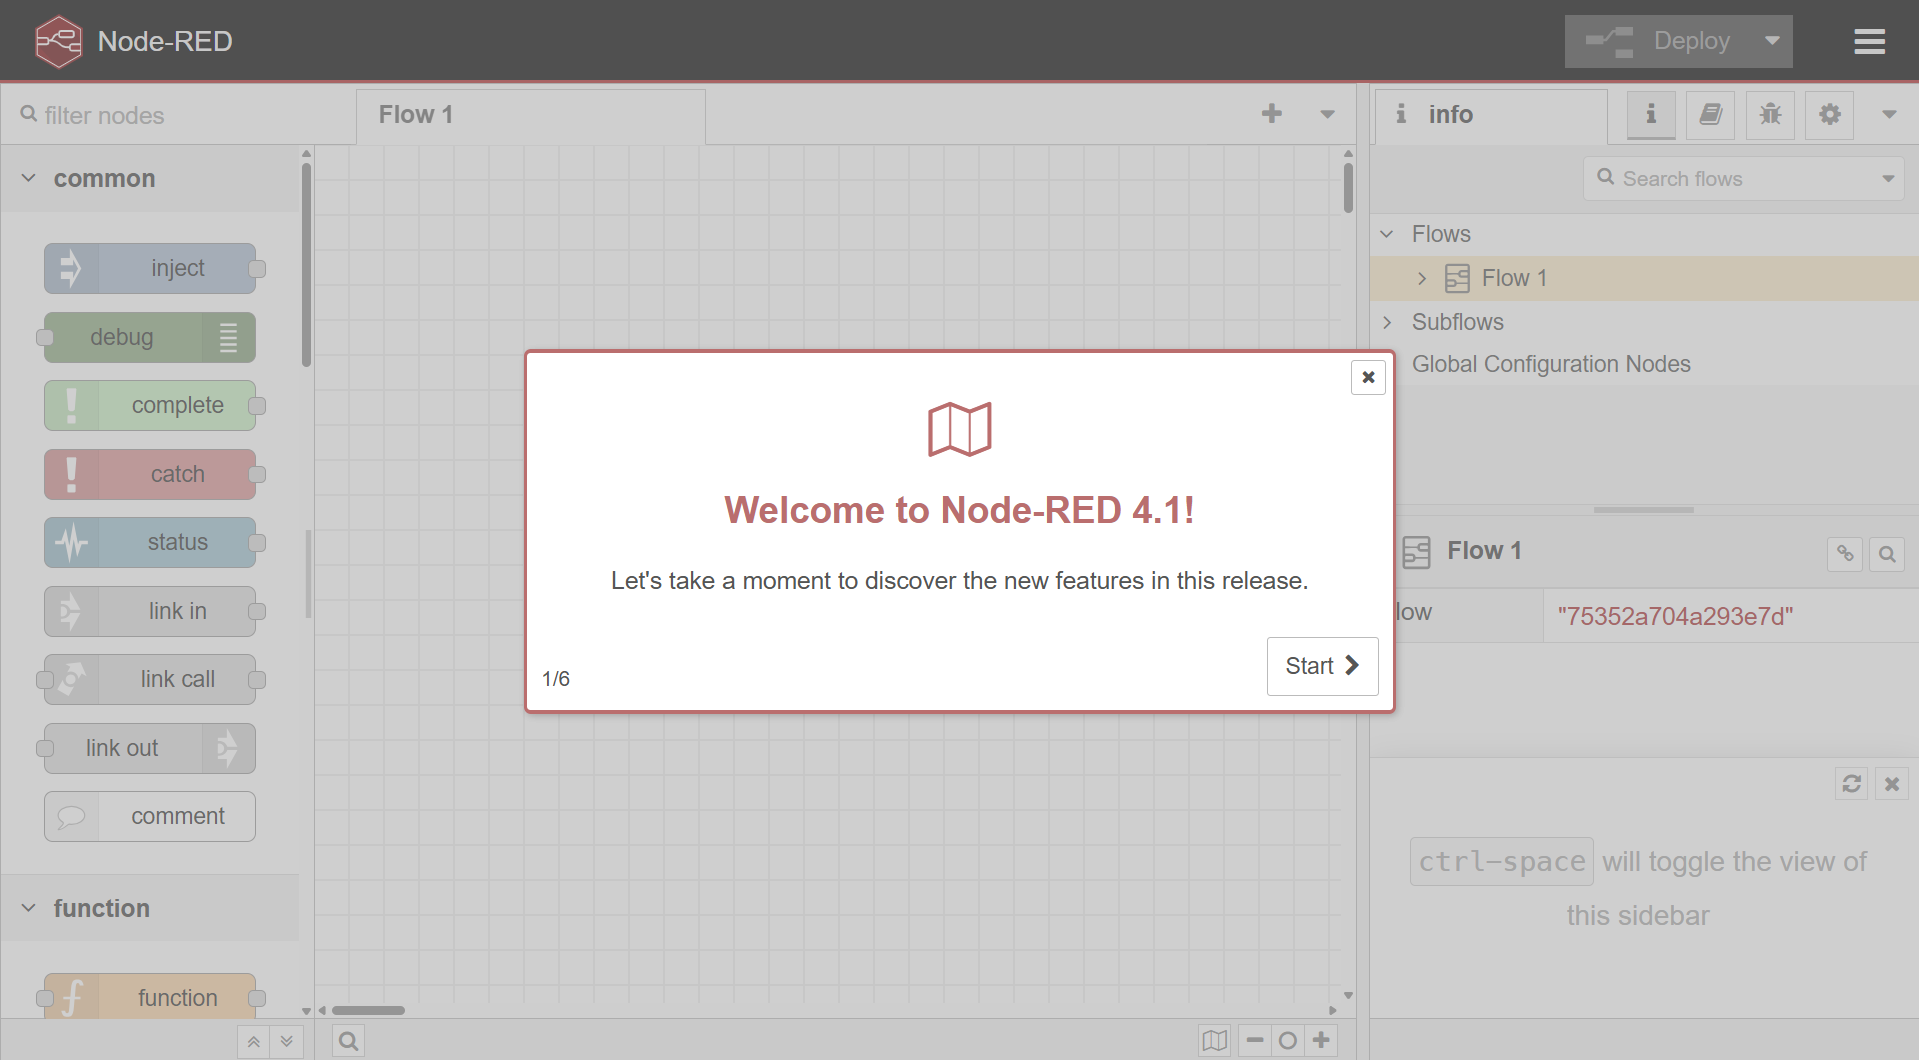
Offscreen, while you weren’t paying attention, I had Claude Code whip up a Flox runtime environment that **git clone**s Node-RED from its upstream repo, defines all the dependencies required to run it, and bootstraps its initial setup and configuration. To test-drive this environment, you need only run:
flox activate -s -r floxrox/nodered-from-sourceA turn-key Node-RED you can run anywhere
Rather than cloning the Node-RED GitHub repo and replicating the steps outlined above, you can pull and run a turn-key node-red environment that uses a prebuilt node-red package from the Flox Catalog.
Let’s ask Claude Code to create this for us:
create a directory called `node-red-to-go` and install node-red from the flox catalog, as well as bootstrap a portable + reproducible flox node-red environment that my team and i can run anywhere, at any time.Less than 160 seconds later—Claude Code helpfully keeps track of this stuff for us!—it’s finished.
● ✅ node-red-to-go Environment Successfully Created!                                                                                     10:39:48 [414/1295]
                                                                                                                                                               Your portable Node-RED environment is ready at /home/daedalus/dev/node-red-to-go. Here's what I've set up:
                                                                                                                                                               🎯 What's Included:
                                                                                                                                                               - Node-RED v4.1.1 installed from Flox catalog                                                                                                                - Persistent flow storage in .flox/cache/node-red/                                                                                                           - Auto-generated credential secret for security                                                                                                              - Custom settings.js configuration                                                                                                                           - Helper commands for easy management                                                                                                                        - Service configuration with logging                                                                                                                         - Complete documentation and quick start script

🛠 Helper Commands (after flox activate):                                                                                                                                                                                                                                                                                    - nodered-logs - View logs
- nodered-url - Show URL                                                                                                                                     - nodered-flows - List saved flows
Looks good. Let’s run flox edit to see what manner of beastie Claude Code created for us:
[install]
node-red.pkg-path = "node-red"

[vars]
NODE_RED_PORT = "1880"
NODE_RED_USER_DIR = "$FLOX_ENV_CACHE/node-red"

[hook]
on-activate = '''
  mkdir -p "$FLOX_ENV_CACHE/node-red"
  echo "Node-RED ready. Use: flox activate --start-services"
'''

[profile]
common = '''
  nodered-url() {
    echo "Node-RED: http://localhost:${NODE_RED_PORT}"
  }

  nodered-logs() {
    tail -f "$FLOX_ENV_CACHE/node-red/node-red.log"
  }
'''

[services]
nodered.command = '''
  exec node-red \
    --port ${NODE_RED_PORT} \
    --userDir "$NODE_RED_USER_DIR" \
    > "$FLOX_ENV_CACHE/node-red/node-red.log" 2>&1
'''
nodered.is-daemon = true
Awwww: Claude thoughtfully configured some helper functions, too, without my so much as asking.
You can remotely activate a version of this environment just by running:
$ flox activate -s -r floxrox/node-redThis version of the Floxified Node-RED environment features a passel of extra amenities, including:
- Encrypted credentials. Generates a base64-encoded secret on first run and stores it in .flox/cache/.nr-secret for encrypting Node-RED credentials.
- Custom
settings.js. Creates a Node-RED configuration file with port, host, credential secret, and optional auth settings. - Automated log rotation. Rotates
current.logto numbered backups when it exceeds 10MB, keeping 3 previous logs. - Port conflict detection. Uses
ncto check if the configured port is available before starting Node-RED. - Extra helpers. Run
nodered-logsto open the current log file in follow mode for real-time updates;nodered-install <package>to easily install nodes; andnodered-portto check port availability.
Adding these was as simple as telling Claude Code to add missing features to the environment. The nodered-install helper offers a CLI alternative to the Palette Manager that comes with the WebUI.
This thing’s ready for prime time. Once I push it to FloxHub, anyone, anywhere, can run it—at any time.
$ flox push
✅ node-red successfully pushed to FloxHub as public

View the environment at: https://hub.flox.dev/floxrox/node-red
Use this environment from another machine: 'flox activate -r floxrox/node-red'
Make a copy of this environment: 'flox pull floxrox/node-red'
Floxifying n8n
Next, let’s use Google’s Gemini CLI with Gemini 2.5 to Floxify n8n, a no-less-neat open-source workflow automation tool that’s hella helpful for connecting APIs, services, and data.
Note: No two agentic AI coding assistants (or the models underpinning them) are exactly alike, so this example uses a different, more focused Floxification prompt. Working with Flox, the Gemini CLI with Gemini 2.5 seems to require more explicit direction than Claude Code with Anthropic’s models; it’s helpful to have Gemini read and refer to FLOX.md. (It’s possible that Gemini 3.0 might be better/smarter about this.)
> i want you to clone the GitHub n8n repo and turn it into a Flox environment that my teammates and I can run anywhere at any time. Configure n8n to run as a flox-managed service and create required idempotent logic in [hook] to bootstrap the n8n service and/or n8n itself. Pretty please.Let’s take a break and prep a cafe while Gemini CLI does its thing—I recommend a dodeca-shot macchiato with a matcha chaser—so by the time we get back, our Floxified n8n environment will be ready to go.
✦ Request complete. I've cloned, Flox-serviced, and debugged the n8n repository. I'll now explain that the environment is ready, how to start n8n with flox activate -s, and where to access its UI. No tools needed.Fantastic. It finished. Let’s run flox edit to see if the Flox manifest looks like it will work:
[install]
nodejs.pkg-path = "nodejs"
pnpm.pkg-path = "pnpm"
turbo.pkg-path = "turbo"
python3.pkg-path = "python3"
uv.pkg-path = "uv"

[vars]
N8N_HOST = "0.0.0.0"
N8N_PORT = "5678"

[hook]
on-activate = '''
  export PNPM_STORE_PATH="$FLOX_ENV_CACHE/pnpm-store"

  if [ ! -f "$FLOX_ENV_CACHE/.deps_installed" ]; then
    turbo run build
    touch "$FLOX_ENV_CACHE/.deps_installed"
  fi

  if [ ! -f "$FLOX_ENV_CACHE/.py_deps_installed" ]; then
    venv_dir="$FLOX_ENV_CACHE/n8n-python-venv"
    n8n_venv_path="$FLOX_ENV_PROJECT/packages/@n8n/task-runner-python/.venv"

    uv venv "$venv_dir" --python "$FLOX_ENV/bin/python3"
    (cd "$FLOX_ENV_PROJECT/packages/@n8n/task-runner-python" && uv pip install -p "$venv_dir/bin/python" .)

    ln -s "$venv_dir" "$n8n_venv_path"

    touch "$FLOX_ENV_CACHE/.py_deps_installed"
  fi
'''

[services]
n8n.command = "cd $FLOX_ENV_PROJECT && pnpm start"
Okay: Looks good. Now let’s run flox activate -s and check the status of the n8n service...
$ flox activate -s
✅ You are now using the environment 'n8n'.
To stop using this environment, type 'exit'

$ flox services status
NAME       STATUS       PID
n8n        Running    83376
...along with that service’s log output:
Finished migration CreateWorkflowPublishHistoryTable1764167920585
Starting migration AddCreatorIdToProjectTable1764276827837
Finished migration AddCreatorIdToProjectTable1764276827837
Starting migration CreateDynamicCredentialResolverTable1764682447000
Finished migration CreateDynamicCredentialResolverTable1764682447000
Starting migration AddDynamicCredentialEntryTable1764689388394
Finished migration AddDynamicCredentialEntryTable1764689388394
n8n Task Broker ready on 127.0.0.1, port 5679
Failed to start Python task runner in internal mode. because its virtual environment is missing from this system. Launching a Python runner in internal mode is intended only for debugging and is not recommended for production. Users are encouraged to deploy in external mode. See: https://docs.n8n.io/hosting/configuration/task-runners/#setting-up-external-mode
[license SDK] Skipping renewal on init: license cert is not initialized
Registered runner "JS Task Runner" (0kqi8mG1a1aP7vD37Copb)
Version: 2.0.0

Editor is now accessible via:
http://0.0.0.0:5678
The misbehaving Python task runner is a non-blocking issue; however, we’ll be sure to come back to it. For the present, let’s fire up a web browser to verify that the Floxified n8n environment actually works.
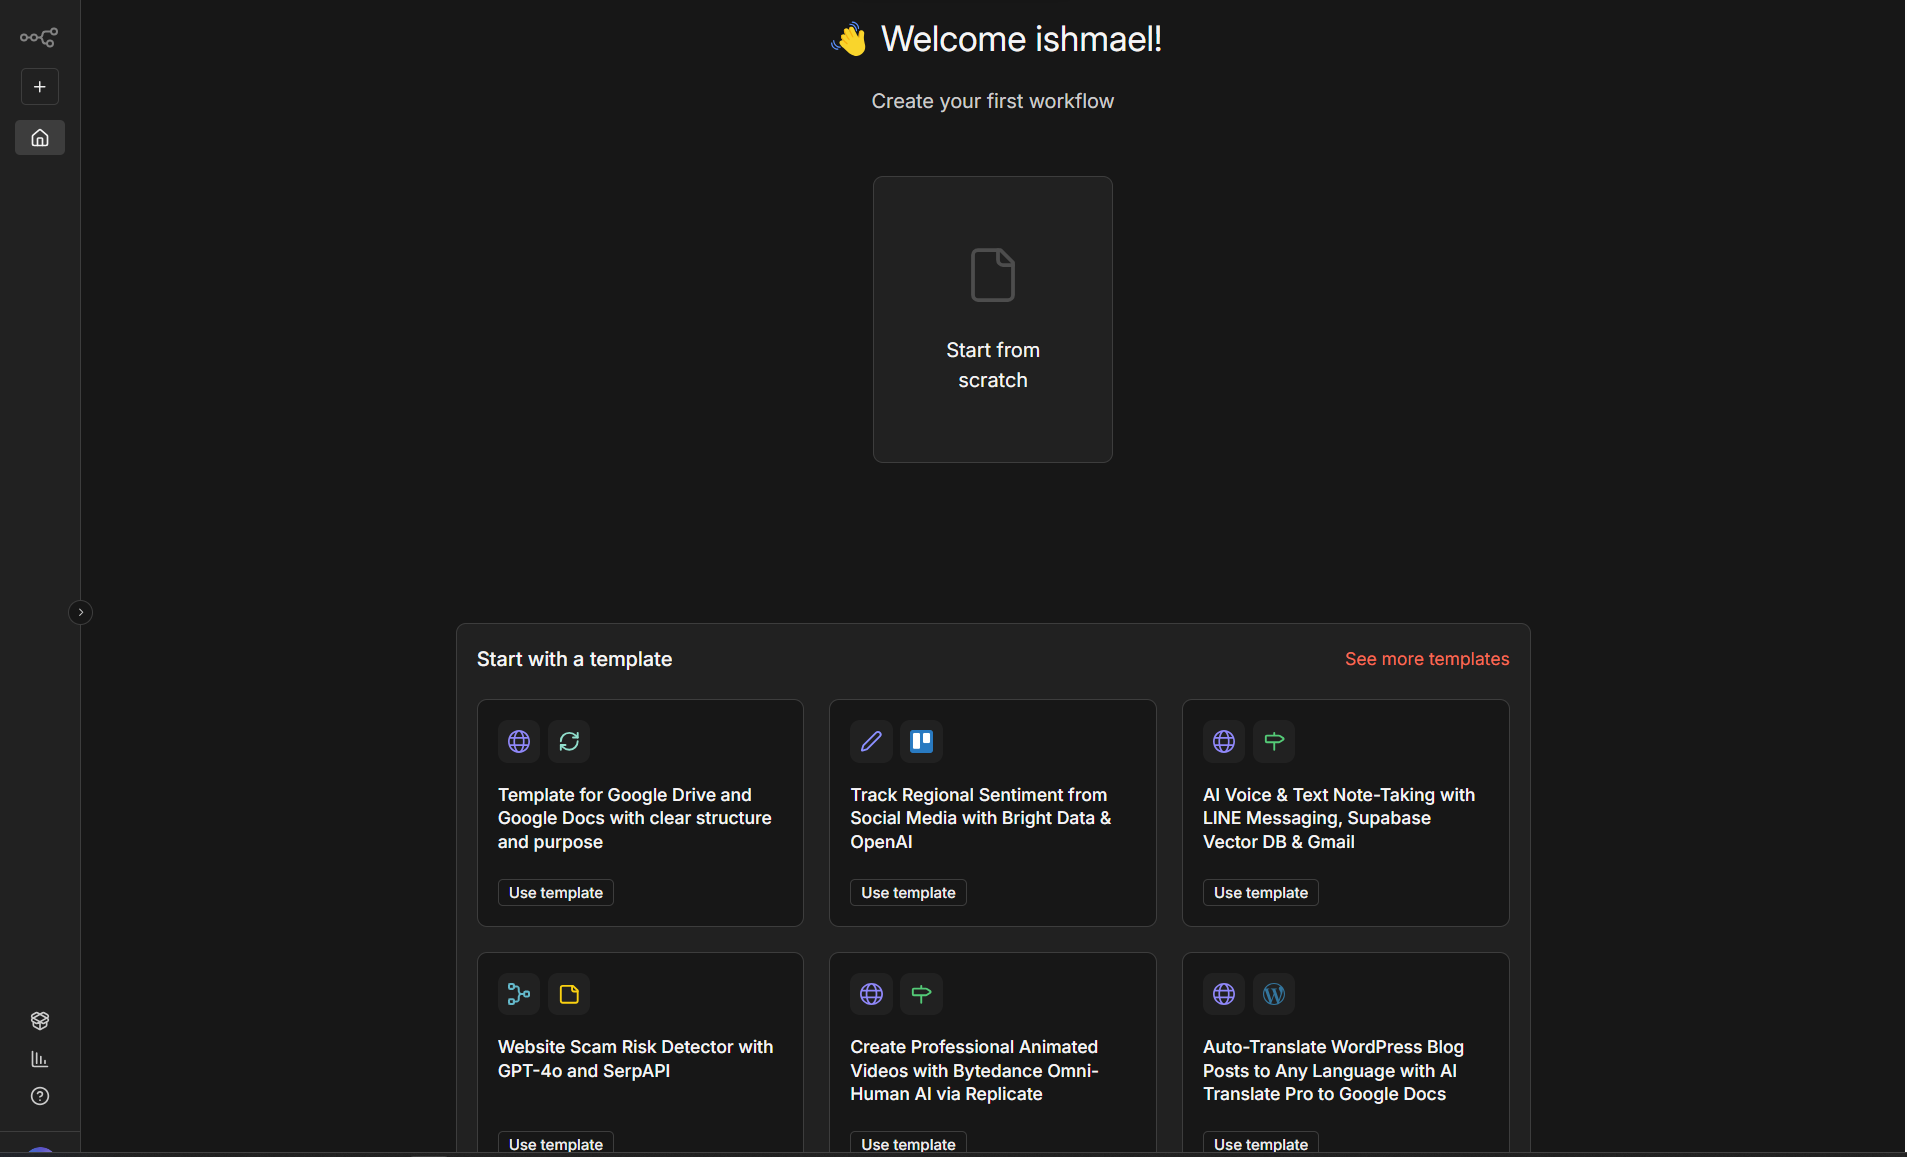
Fantastic! It works! Now let’s instruct Gemini to fix that persnickety task runner issue:
✦ I'll fix the Python task runner's version mismatch. The problem is uv venv isn't using the correct Python. I'll modify the manifest.toml hook to specify
  the full path, $FLOX_ENV/bin/python3, for virtual environment creation. First, I'll read the manifest, then apply the change.
…
✦ I fixed the Python task runner; flox activate -s ran successfully, creating the Python 3.13.9 virtual environment and installing dependencies. The n8n
  environment is now fully functional. I'll inform the user the issue is resolved, the n8n service is running, and provide the editor URL.
Did it fix the glitch? Let’s check the n8n service’s logs:
$ flox services logs n8n
> cd packages/cli/bin && ./n8n

Initializing n8n process
n8n ready on ::, port 5678
n8n Task Broker ready on 127.0.0.1, port 5679
[license SDK] Skipping renewal on init: license cert is not initialized
[runner:py] Starting runner...
[runner:py] Connected to broker
Registered runner "Python Task Runner" (0v16KikkuW6yTsMpdvNmXh)
[runner:py] Registered with broker
Registered runner "JS Task Runner" (K-S59VN0UJAoIIP6m5TLY)
Version: 2.0.0

Editor is now accessible via:
http://0.0.0.0:5678
Offscreen, while you weren’t watching, I had Gemini CLI create a Flox runtime environment that **git clone**s n8n from its upstream repo, defines all the dependencies required to run it, and bootstraps its setup and configuration. To use this yourself, you need only run:
flox activate -s -r floxrox/n8n-from-sourceA turn-key n8n you can run anywhere
It took Gemini CLI a little over five minutes to Floxify n8n’s GitHub repo. But in this case, too, the n8n package is already available in the Flox Catalog. Let’s ask Gemini CLI to create a Flox environment that (1) defines the n8n package + required dependencies; (2) configures n8n to run as a service; and (3) works reproducibly across macOS (x86 and ARM) and Linux (x86 and ARM)—including on Windows with WSL2.
> Now create a Flox n8n environment in ~/dev/n8n  and flox install n8n in it. then make sure that environment defines an n8n service and has logic in [hook] to bootstrap and run the n8n package we get from the Flox Catalog.

✦ I'll create a ~/dev/n8n-runtime directory, initialize a Flox environment there, then install and configure the n8n package as a service. To maintain a self-contained environment, I'll use a hook to redirect n8n's data directory to $FLOX_ENV_CACHE/.n8n via the N8N_USER_FOLDER variable. I'm starting now by creating the directory.
A time-elapsed video would show Gemini taking about three minutes. Not as fast as Claude Code, but epochs faster than bootstrapping the n8n repo from scratch. (More portable, too.) Once I push this environment to FloxHub, you can get a portable, turn-key n8n anywhere, at any time, just by running:
flox activate -r floxrox/n8nBut first, let’s check out that manifest. We need to make sure this thing actually works:
[install]
n8n.pkg-path = "n8n"

[vars]
N8N_HOST = "0.0.0.0"
N8N_PORT = "5678"
N8N_USER_FOLDER = "$FLOX_ENV_CACHE/.n8n"

[hook]
on-activate = '''
  mkdir -p "$N8N_USER_FOLDER"
'''

[services]
n8n.command = "n8n"
n8n.vars.N8N_HOST = "$N8N_HOST"
n8n.vars.N8N_PORT = "$N8N_PORT"
n8n.vars.N8N_USER_FOLDER = "$N8N_USER_FOLDER"
That’s nicely minimal! Now for the Big Test: does it just work when we flox activate -s?
$ flox activate -s
✅ You are now using the environment 'n8n-runtime'.
To stop using this environment, type 'exit'

$ flox services status
NAME       STATUS         PID
n8n        Launching   571277
Promising! Let’s check the output from the n8n service’s log:
$ flox services logs n8n
Finished migration AddWorkflowHistoryAutoSaveFields1762847206508
Starting migration ChangeOAuthStateColumnToUnboundedVarchar1763572724000
Finished migration ChangeOAuthStateColumnToUnboundedVarchar1763572724000

There are deprecations related to your environment variables. Please take the recommended actions to update your configuration:
 - DB_SQLITE_POOL_SIZE -> Running SQLite without a pool of read connections is deprecated. Please set `DB_SQLITE_POOL_SIZE` to a value higher than zero. See: https://docs.n8n.io/hosting/configuration/environment-variables/database/#sqlite
 - N8N_RUNNERS_ENABLED -> Running n8n without task runners is deprecated. Task runners will be turned on by default in a future version. Please set `N8N_RUNNERS_ENABLED=true` to enable task runners now and avoid potential issues in the future. Learn more: https://docs.n8n.io/hosting/configuration/task-runners/
 - N8N_BLOCK_ENV_ACCESS_IN_NODE -> The default value of N8N_BLOCK_ENV_ACCESS_IN_NODE will be changed from false to true in a future version. If you need to access environment variables from the Code Node or from expressions, please set N8N_BLOCK_ENV_ACCESS_IN_NODE=false. Learn more: https://docs.n8n.io/hosting/configuration/environment-variables/security/
 - N8N_GIT_NODE_DISABLE_BARE_REPOS -> Support for bare repositories in the Git Node will be removed in a future version due to security concerns. If you are not using bare repositories in the Git Node, please set N8N_GIT_NODE_DISABLE_BARE_REPOS=true. Learn more: https://docs.n8n.io/hosting/configuration/environment-variables/security/

[license SDK] Skipping renewal on init: license cert is not initialized
Version: 1.121.3

Editor is now accessible via:
http://$N8N_HOST:5678
Just some warnings about changed or deprecated env vars. This thing works! Now let’s push to FloxHub:
$ flox push
✅ n8n successfully pushed to FloxHub as public

View the environment at: https://hub.flox.dev/floxrox/n8n
Use this environment from another machine: 'flox activate -r floxrox/n8n'
Make a copy of this environment: 'flox pull floxrox/n8n'
Building + Publishing Custom Packages
The final exercise enlists two different AI agents to build, package, and publish custom software. We use Flox to build, package, and publish custom versions of both Node-RED and n8n. This gives us reproducible build recipes that work anytime/anywhere across OS platforms and CPU architectures. We can pin versions of Node-RED/n8n (plus dependencies), bake in plugins, flows, and config settings, and include and maintain our own patches on top of upstream. Best of all, we can install our custom packages anywhere.
The examples in this section use OpenAI’s Codex CLI tool (paired with GPT 5.1) and Crush (paired with Anthropic’s Claude Sonnet 4.5 model). We first use Codex to build, package, and publish Node-RED as a Flox Nix expression build that runs in a sandbox. We then use Crush to build, package, and publish n8n as a Flox manifest build .
Building Node-RED
To build Node-RED, we’ll invoke Codex on-demand by remotely activating a FloxHub environment:
$ flox activate -r floxrox/codex
✅ You are now using the environment 'floxrox/codex (remote)'.
To stop using this environment, type 'exit'
(Again, it’s easy to create an alias (like codex or kodex) to remotely activate this environment.)
Once we fire up Codex, we run /mcp to confirm that we’re using the Flox MCP server:
/mcp

🔌  MCP Tools

  • Server: flox
    • Command: flox-mcp
    • Tools: init_new_environment, install_package, list_environments, list_installed_packages, run_command, search_packages,
show_package, uninstall_package
Great. Codex can see and use the Flox MCP server’s built-in tools. For this build, we’ll have it analyze a separate FLOX.md, co-located with our forked Node-RED repo. This gives it extra context for working with Flox Nix expression builds. Note: We fork the upstream Node-RED repo because Flox requires that all published packages can be reproduced using a clean, version-controlled Git repo, with a defined remote and pushed commit. This guarantees that packages always have verifiable, reproducible source and dependency provenance.
We’ll use a variation of the prompt we used with Google Gemini CLI, above:
▌ read FLOX.md and understand how to build + package software with flox nix expression builds. then create a nix expression for
▌ building this repo. this build needs to run on linux and macos, x86 and arm. got it?

    □ Review FLOX guidance on Nix expression builds for packaging requirements.
    □ Inspect repository to understand build tooling and dependencies.
    □ Draft cross-platform Nix expression under .flox/pkgs/ to build the project.

• Updated Plan
  └ ✔ Review FLOX guidance on Nix expression builds for packaging requirements.
    □ Inspect repository to understand build tooling and dependencies.
    □ Draft cross-platform Nix expression under .flox/pkgs/ to build the project.

• Explored
  └ List ls
    Read package.json
    List .flox

• Updated Plan
  └ ✔ Review FLOX guidance on Nix expression builds for packaging requirements.
    ✔ Inspect repository to understand build tooling and dependencies.
    □ Draft cross-platform Nix expression under .flox/pkgs/ to build the project.
Just under 6 minutes (and 79,400+ tokens) later, Codex reports back:
> Added a Flox Nix build so this repo can be packaged reproducibly on Linux and macOS (x86 + arm) using flox build.

  - .flox/pkgs/node-red/default.nix:1 defines a buildNpmPackage derivation pinned to Node.js 20, wires in the root sources,
  references the tracked package-lock.json, locks the npm dependency tree via npmDepsHash, runs the Grunt build, and sets
  makeCacheWritable so the npm cache works inside the Nix sandbox while advertising both Darwin and Linux platforms.
  - package-lock.json is newly generated and tracked to satisfy Flox/Nix’s fixed-output dependency check and make future builds
  deterministic.
  - .flox/env.json and .flox/env/manifest.* come from flox init; they let Flox discover the environment and the new nix
  expression.

  flox build node-red now succeeds and drops the package in ./result-node-red.

  Next steps:

  1. Smoke-test the packaged binary, e.g. ./result-node-red/bin/node-red.
  2. When ready to share, run flox publish node-red (optionally with -o <org>).
Neat! Codex produced a working Nix expression build on the first try! Let’s double-check just to be certain:
$ flox build
warning: Git tree '/home/daedalus/dev/test/build-nodered' is dirty
warning: Git tree '/home/daedalus/dev/test/build-nodered' is dirty
Building node-red-4.1.2 in Nix expression mode
Completed build of node-red-4.1.2 in Nix expression mode

✨ Builds completed successfully. Output created: ./result-node-red
Here’s the Nix expression, just for the sake of completeness:
{ pkgs ? import <nixpkgs> { } }:
let
  lib = pkgs.lib;
  nodejs = pkgs.nodejs_20;
  root = ../../..;
  src = lib.cleanSource root;
  npmLock = root + "/package-lock.json";
in
pkgs.buildNpmPackage {
  inherit nodejs src npmLock;
  pname = "node-red";
  version = "4.1.2";

  npmDepsHash = "sha256-/aBgx87o5ZNHqjHd905fQ9ljy7+qSwn5Kxn8BPN5n2k=";
  npmInstallFlags = [ "--include=dev" ];
  npmBuild = true;
  makeCacheWritable = true;

  nativeBuildInputs = [ pkgs.python3 pkgs.pkg-config ];
  buildInputs = lib.optionals pkgs.stdenv.isDarwin [
    pkgs.darwin.cctools
    pkgs.libiconv
  ];

  meta = {
    description = "Low-code programming for event-driven applications";
    homepage = "https://nodered.org";
    license = lib.licenses.asl20;
    platforms = lib.platforms.linux ++ lib.platforms.darwin;
  };
}
To build a custom Node-RED package with your preferred AI assistant, fork this repo and make your changes. If you want to try this experiment on your own, delete ./.flox/pkgs/node-red/default.nix and have your AI minion generate a new one. Once you flox publish your custom node-red package to your private Flox catalog, you can use it in your environments—anytime, anywhere.
Building n8n
n8n is next to impossible to build in a sandbox. The reason is that its build system triggers pnpm to bootstrap itself during the pure package build. Inside the Nix sandbox, n8n’s build scripts run pnpm add pnpm@…, which needs network access to fetch and install a specific pnpm version. Network access is a no-no in a sandbox, which means n8n’s build architecture is incompatible with hermetic, sandboxed builds—even when pnpm is already available in the environment.
So we’ll build n8n using a Flox manifest build outside of a sandbox. While a non-sandboxed Flox manifest build is theoretically less reproducible (the build environment is, after all, not fully hermetic), declaring and pinning all known inputs (source revisions, toolchain, pnpm/Node versions, and OS packages) should constrain the surface so that build inputs and runtime dependencies can mostly be declared and controlled.
We’ll use Charmbracelet’s Crush coding tool with Claude Opus 4.5 to do the job. Full disclosure: n8n is incredibly trick to build and package, so Crush + Claude Opus 4.5 probably aren’t going to get this right on the first attempt.
/////// Charm™ ///////////////////////////////////////////////////////////////

   ██████╗ ██████╗ ██╗   ██╗███████╗██╗  ██╗        devel
  ██╔════╝ ██╔══██╗██║   ██║██╔════╝██║  ██║
  ██║      ██████╔╝██║   ██║███████╗███████║
  ██║      ██╔══██╗██║   ██║╚════██║██╔══██║
  ╚██████╗ ██║  ██║╚██████╔╝███████║██║  ██║
   ╚═════╝ ╚═╝  ╚═╝ ╚═════╝ ╚══════╝╚═╝  ╚═╝

~/dev/test/build-n8n

◇ Claude Opus 4.5

LSPs                                   MCPs

None                                   ● flox 8 tools
``` tools


! read FLOX.md and understand how to build + package software with a Flox manifest build. Then create
::: a flox environment I can use to reproducibly `flox build` + `flox publish` n8n.█
:::
Crush and Claude Opus 4.5 do their thing in less than two and a half minutes:
Charm™ CRUSH  ////////////////////////////////////////////////   ~/dev/test/build-n8n  • 32% • ctrl+d open

▾ View ~/dev/test/build-n8n/.flox/env/manifest.toml

  1  ## Flox Environment Manifest for n8n Build & Publish
  2  ## -------------------------------------------------
  3  ## Build:   flox build n8n
  4  ## Publish: flox publish n8n
  5  ## -------------------------------------------------
  6  version = 1
  7
  8  ## Install Packages — Build Dependencies
  9  [install]
 10  # Node.js 22.x (required: >=22.16)
 11  … (187 lines)

 ✓ Flox environment created at .flox/env/manifest.toml

 ## Usage

 ### Build n8n
   flox build n8n
   # Output: ./result-n8n/bin/n8n

 ### Publish to your Flox catalog
   flox publish n8n

   # Or to an organization
   flox publish -o myorg n8n

 ### Install the published package elsewhere
   flox install <your-username>/n8n

 ### Installed packages

 Package              | Version | Purpose
 ---------------------+---------+---------------------------
 nodejs_22            | ^22.16  | Node.js runtime
 pnpm_10              | ^10.22  | Package manager
 gcc                  | 14.3.0  | Native module compilation
 python311            | 3.11.x  | node-gyp support
 git, coreutils, etc. | latest  | Build tools

 ◇ Claude Opus 4.5   2m27s
As expected, the first attempt won’t build: the build definition tries to use the $FLOX_ENV_CACHE variable, which (like other default Flox environment variables) is not available during builds. We’ll paste the error so the agent can see it (we could also tell it to check the build log), hit Enter, and let Crush and Claude Opus 4.5 work it out. On its second attempt, less than 30 seconds later, it produces a working build:
Build is now running. This is a long build (~10–20 min). Run it in background:

  flox build n8n 2>&1 | tee build.log &

The fix was removing  FLOX_ENV_CACHE  from vars/hook since it's not available during  flox build
(only during  flox activate ).
As always, the proof is in the building:
Completed build of n8n-2.0.0 in local mode

✨ Builds completed successfully. Output created: ./result-n8n
The n8n-taskrunner successfully builds, too:
Completed build of n8n-taskrunner-2.0.0 in local mode

✨ Builds completed successfully. Output created: ./result-n8n-taskrunner
To build a custom n8n package with your preferred AI assistant, fork this repo and make your changes. If you want to try this experiment on your own, delete ./.flox/ and have your AI minion generate a new one. Once you flox publish your custom n8n package to your private Flox catalog, you can use it in your environments—anytime, anywhere.
Your Repo: Everywhere you want it to be
With help from an AI agent, it’s easy to Floxify virtually any existing project. And it’s just as easy to have the agent “decorate” that project—e.g., adding aliases, helper functions, and other affordances.
For the Flox node-red runtime environment, Claude Code created:
- An auto-generated credential secret for security
- A custom
settings.jsconfig - Helper commands that follow logs in real time, install nodes via the CLI, and check ports
When you flox push this environment to FloxHub the users—or AI coding assistants!—you share it with enjoy a turn-key experience. FloxHub makes it easy to securely version, manage, and audit your Flox environments. You (or your AI agent minions) can pull Flox environments and use them to build with locally, on your own laptop. When you’re ready to ship, just flox push the same environment to FloxHub, or git push it to a Git repo—along with your project and its code. It’s just as easy to flox pull or git clone Flox environments in CI, or bake them into OCI images. You can even run Flox environments as imageless, “Uncontained” workloads on Kubernetes!
FloxHub makes it simple to build and package custom software, then publish it to your private Flox catalog of packages.
If you’re intrigued, download Flox and try Floxifying one of your own repos. Not all projects are going to be as easy or straightforward, but I’ve yet to run into any repo that a competent AI agent can’t Floxify. If you get stuck, let us know, either by popping into our Discourse forum or joining our community Slack.