


Reproducible Dev Environments in Your Workflow with Flox and VS Code
Flox’s VS Code extension integrates cleanly with the industry’s most popular IDE. It makes it simple to create, modify, activate, and monitor Flox environments from directly within your VS Code daily driver. Vroom, vroom.
Under the hood, the Flox extension hooks into VS Code’s workspace and integrated terminal lifecycle. This means Flox environments always start pre-activated, with VS Code surfacing clickable controls you can use to get info about environments and services (what’s installed, versions, services, logs) in its sidebar.
The Flox VS Code extension is especially useful for agentic workflows. New, agent-initiated shell processes spawn with pre-configured packages and automations, so agents don’t need to know anything about Flox.
Vroom, vroom indeed.
Flox VS Code Integration: What You Can Do
The extension focuses on a few high-value tasks that teams repeat dozens of times per day.
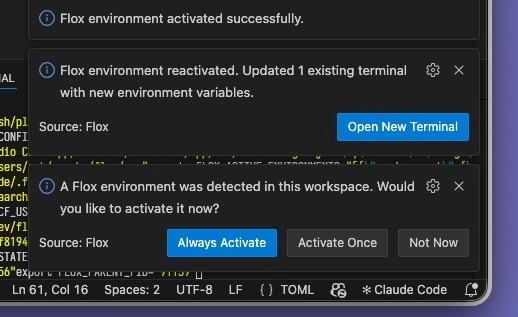
Auto-activate Flox in new terminals When you open a new terminal session within VS Code, that process always spawns with the correct Flox environment already activated. This is most noticeable when something else is creating terminals for you:
- Test runners spawn new shell sessions. Some test runners spawn child processes (subshells); auto-activation makes sure these subshells inherit the right tools**
$PATH** so tests run without human oversight. - Scripts open new shell sessions. Some scripts spawn new terminals/subshells for isolation or interactivity; with auto-activation the new terminal comes up with the correct
$PATHand other env vars. - Agentic tools spawn new terminal shell sessions. Agents can start work in pre-activated Flox environments, getting automatic access to required dependencies, env vars, built-in functions, aliases, etc.
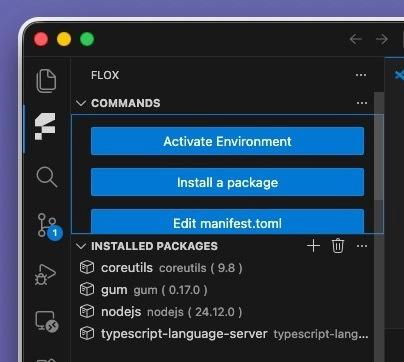
See what packages are installed The VS Code sidebar now gives you an at-a-glance view of what’s in your Flox environment, including installed packages, as well as which versions of packages you’re currently using.

It also gives you a fast path (one-click access) to common actions like initializing, installing packages into, or activating environments.
And because it’s VS Code, you can also declaratively edit environments, just as you’d edit or compose code—by making changes to the environment’s TOML manifest, with the same familiar VS Code workflow. Saving your changes prompts the extension to reload your environment and refresh the sidebar. If the manifest contains an error, the extension logs details in Output → Flox. (VS Code doesn’t currently flag the issue inline in the editor.)
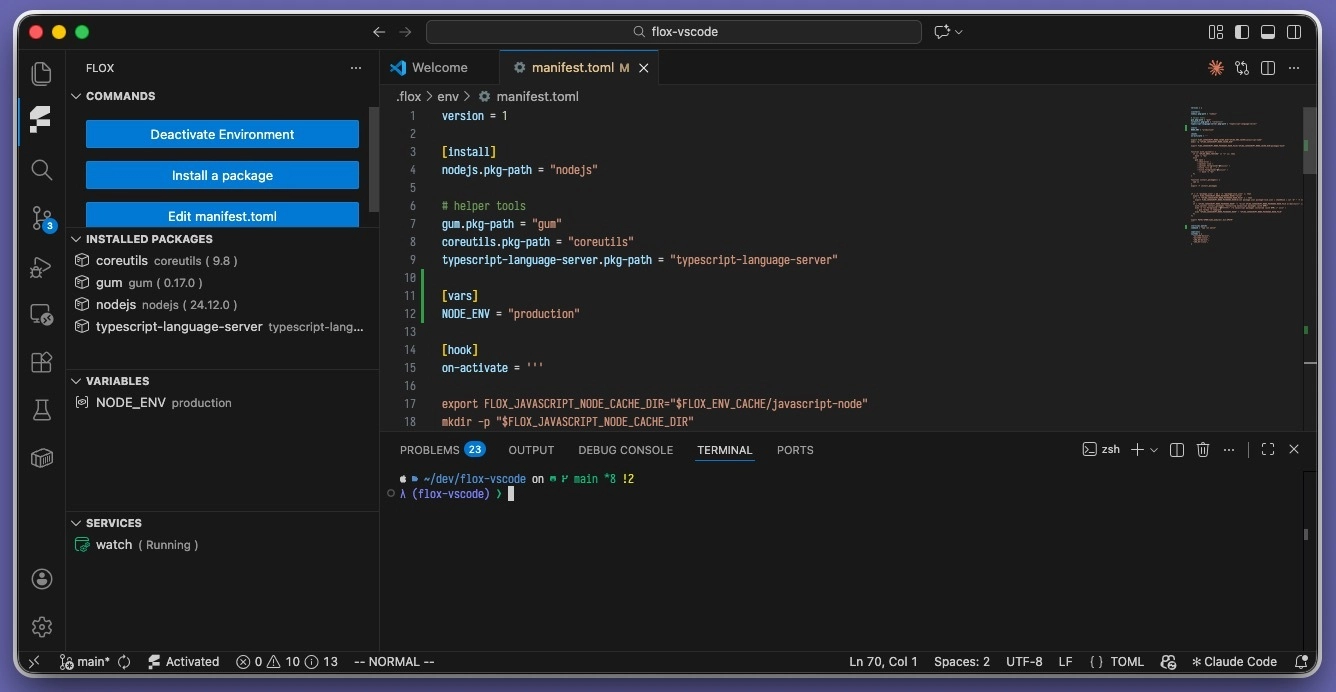
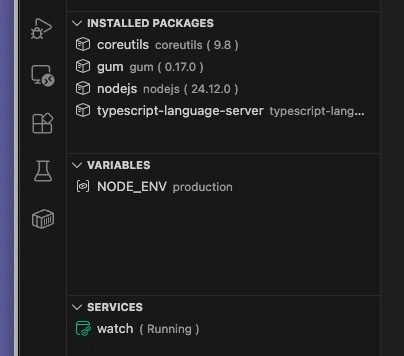
Manage services and view logs If your Flox environment includes services, you get a helpful control surface in the VS Code sidebar:
- See service status
- Start/stop/restart services
- Open/follow logs from the UI while you iterate
You can achieve a similar effect in a TUI with a multiplexer, but the VS Code UX is arguably more intuitive. This isn’t limited to local workspaces, either: auto-activation also works when VS Code runs your workspace remotely.
Auto-activate Flox in remote workspaces, too
VS Code can run your workspace on a remote host (Remote-SSH), inside a container (Dev Containers), or in WSL, not just on your local machine. The Flox extension reliably activates the appropriate Flox environment in that remote target, so integrated terminals, tasks, tests, and agent-spawned shells all start with the expected $PATH and environment variables. The only requirement is that Flox needs to be installed on the remote system. Here’s how this works:
-
Open a project over SSH, spawn pty sessions that start with the expected Flox environment activated on the remote host.
-
Build/open a dev container workspace and get the same auto-activated Flox context in integrated terminal sessions and spawned processes.
-
When working with VS Code and WSL2, terminal sessions + task/debug shells pick up the expected Flox environment, along with all environment variables, packages, automation logic, services, etc.
How Flox Integrates with VS Code
Auto-activation isn’t “just” a convenient feature: it’s the foundation for meaningful integration with VS Code, formalizing the context in which shell sessions spawn and run. Think about it: When your workflow (tests, scripts, agents) spawns a new shell process, that child process starts with the same working context as the VS Code workspace. This eliminates “works on my machine” within your editor context. That’s essential.
Basically, when you:
- Open a workspace that contains (or points to) a Flox environment, the extension recognizes it.
- Spawn a new integrated terminal, the extension activates the environment for that terminal.
- Glance at the sidebar, the extension surfaces information about your Flox environments and services.
Best of all, the extension surfaces UI buttons that map to operations you already perform with the Flox CLI.
Getting it: install and first run
The Flox VS Code extension installs like any other VS Code extension.
- Open Extensions in VS Code.
- Search for “Flox”.
- Click Install (VS Code may prompt you to reload).
Then:
- Open a project that uses a Flox environment.
- Look for the Flox environment view in the sidebar.
- Kick off a new integrated terminal to see auto-activation in action.
Practical Tips for Using Flox in VS Code
As with most if not all extensions, the Flox VS Code extension has a few rough edges.
-
Heavily customized VS Code setups can behave predictably. If you run lots of extensions, use remote/custom hosts, or have a heavily customized shell configuration, you might see odd behavior. If auto-activation or other integrations aren’t working, try the extension in a clean-slate VS Code profile.
-
UI state occasionally lags. In rare cases, the sidebar status can lag the actual service state for a moment after a start/stop, so you may briefly see a stale indicator while it refreshes. If something looks off, give it a moment; use the CLI as the source of truth when you need a definitive answer.
-
Deactivation and “quit” edge cases. Some users report scenarios where an environment doesn’t fully “quit” from the UI. If this happens, the CLI remains the most dependable route for activate/deactivate operations. Flox Labs is investigating (+ struggling to reproduce) this behavior, so feedback is welcome.
-
Interactive install flows may render oddly inside integrated terminal sessions. If an install or interactive terminal UI looks garbled in VS Code, run that step in an external terminal and then return to VS Code.
Bringing it all back $HOME
If you rely on VS Code as your daily driver, the extension makes Flox a fully enfranchised citizen in your in-editor workflow. Terminal sessions spawn pre-activated in the right Flox environment. The VS Code sidebar functions as a dashboard for All Things Flox, giving you an at-a-glance view of the environments you’re working with, and surfacing per-environment information about installed packages, services, and other details.
Psst: Want to make Flox even better? Try FloxHub.
It makes it easy for you and your teammates—or your AI agents!—to pull and run curated, ready-to-use Flox environments on demand. These pre-built environments span common workflows like cloud CLIs (AWS CLI, GitHub CLI); databases (Postgres, MariaDB, MySQL, Redis, MongoDB); containers and Kubernetes (KIND, Podman, Colima); workflow schedulers (Airflow, Dagster, Temporal, Prefect, Node-RED, n8n); streaming + batch compute (Kafka); notebooks (Jupyter), Node.js + Python dev envs; and ML tooling (ComfyUI, Ollama, OpenWebUI). FloxHub also distributes prebuilt and patched CUDA components (toolkit libraries, PyTorch, TensorFlow, and other dependencies) so GPU-capable environments behave reproducibly across machines.