


Get a Portable RAG Stack & Vector Database with Verba and Flox
If you’re doing anything with large language models (LLM), you’ve probably looked into retrieval-augmented generation, or RAG, a proven pattern for improving the accuracy and reliability of their output.
Thanks to projects like Ollama, setting up a local LLM is pretty much a snap.
But what about implementing a RAG pattern? Is there a turn-key solution that makes setting up a RAG stack as simple as spinning up a local LLM? Yes, there is!
By combining Flox, Ollama, Weaviate, and Verba—an open-source “personal assistant” created by the folks at Weaviate—you can create a portable, reproducible, turn-key RAG stack. Something you can build with locally on your Mac, Linux, or Windows system, then push with confidence to CI and deploy to production.
A turn-key RAG stack that Just Works—without VMs or containers. Intrigued? Read on to get the scoop!
RAG Explained
First, let's say a bit about what RAG is. If you already grok this, feel free to skip ahead to the next section.
Training an LLM from scratch is prohibitively expensive. Fine-tuning an LLM is less expensive, but still requires specialized expertise, expert-level data prep, and sometimes beefy computational resources.
RAG is a technique that enriches the prompts you send to an LLM by retrieving and integrating relevant external context, usually from a vector database. It constrains the model to focus on this hardened input, refining the input’s problem space and narrowing its scope to trusted, authoritative, up-to-date sources.
To implement a RAG pattern, you follow these steps:
- Break up your documents into chunks;
- Generate vector embeddings from said chunks;
- Load these embeddings into a vector database;
- Query the vector database for relevant embeddings when the user submits a prompt;
- Use the embeddings to retrieve chunks that get appended to the prompt and sent off to the LLM.
RAG is useful when you have access to a large corpus of subject- or domain-specific information (whether public or proprietary) that you can use to augment the knowledge and improve the accuracy of a general-purpose LLM. While commonly used with conversational agents (like chatbots), it’s a popular choice for any use case where an LLM needs to generate accurate, context-aware responses.
To implement a RAG pattern, you need (1) an LLM, (2) a vector database, (3) a retrieval engine, and (4) some software or services to knit everything together. This might sound heavy-duty, but it isn’t—or it needn’t be. So don’t listen to naysayers who object that it’s too complex or heavyweight for local use. You can run everything you need locally—without creating a complex multi-container runtime or orchestrating multiple VMs.
Setting up your RAG environment with Verba & Flox
To get started, all you have to do is pull our Verba example environment from FloxHub:
mkdir verba && cd verba
flox pull --copy flox/verba
Let’s walk through the sections of this environment and explore how it works, so you can understand how to easily customize it to suit your needs.
First, run flox edit to view and edit its manifest. If you’ve already configured an EDITOR environment variable, running flox edit opens its manifest in your preferred editor. (If you haven’t done so, flox edit defaults to nano.) To edit this file manually, just open up the manifest.toml file that lives in ./.flox/env/.
The [install] section of manifest.toml defines each of the packages used in the environment, along with specific version, package group, and system constraints.
This environment provides Python, which is required for Verba; we will install Verba via pip later in the manifest, since it is not (yet!) available in the Flox Catalog.
[install]
python310.pkg-path = "python310"
We also install Weaviate, the popular open source vector database, and Ollama, both with pinned versions.
weaviate.pkg-path = "weaviate"
weaviate.version = "1.25.9"
ollama.pkg-path = “ollama”
ollama.version = "0.3.5"
In addition to these core packages, we’ll install a few helpers—specifically, bash and curl, which we’ll use later when starting services, and gum, which lets us show a spinner while Verba is installing.
gum.pkg-path = "gum"
bash.pkg-path = "bash"
curl.pkg-path = "curl"
Configuring your RAG stack with Flox
The [vars] section in this environment does a lot of heavy lifting. First, it's here that we tell Flox which Python package to install for Verba. We have chosen goldenverba for this example environment, but we could also have used goldenverba[huggingface], which adds support for Hugging Face components like SentenceTransformers. (These are optimized for encoding sentences into vector embeddings.)
You can add these yourself just by modifying the name of the package below!
[vars]
# The name of the Verba package to install
VERBA_INSTALL_PACKAGE = "goldenverba"
This environment also defines the user-customizable variables we’ll use to configure Weaviate...
# This configures Weaviate, and configures Verba to use it
WEAVIATE_URL_VERBA = "http://localhost:8080"

# Weaviate data path
PERSISTENCE_DATA_PATH = "./verba-data"

# Leave Weaviate wide open (for now!)
AUTHENTICATION_ANONYMOUS_ACCESS_ENABLED = "true"

# Weaviate query default limit
QUERY_DEFAULTS_LIMIT = "10"
...along with user-configurable variables for our old friend Ollama, which we use to pull and run foundation models.
# This configures Verba to use the local Ollama instance
OLLAMA_URL = "http://localhost:11434"

# Our Ollama models
OLLAMA_MODEL = "llama3"
OLLAMA_EMBED_MODEL = "mxbai-embed-large"
Because GoldenVerba isn’t yet in Flox Catalog, we need to get it from PyPI. We can take advantage of Flox’s support for activation hooks to automate the process of installing the verba package using pip.
[hook]
on-activate = '''
  export PYTHON_DIR="$FLOX_ENV_CACHE/python"

  if [ ! -d "$PYTHON_DIR" ]; then
    gum spin -s globe --title "Creating venv in $PYTHON_DIR..." -- python -m venv "$PYTHON_DIR"
  fi

  (
    source "$PYTHON_DIR/bin/activate"
    gum spin -s monkey --title "Installing/updating Verba..." -- pip install "$VERBA_INSTALL_PACKAGE"
  )
'''
Managing Stack Services with Flox
Flox has powerful built-in service management capabilities, which is super convenient, because our environment needs to start, run, and monitor several services! Let’s walk through how this works.
Basically, you can define and configure services in Flox using declarative methods:
[services.<service_name>]
command = “<command_options_flags_arguments>
The syntax is fairly simple: just define both the name of the service and the command Flox has to use to run it. That’s all there is to it! So the service definition for weaviate, our vector database, looks like:
# Start Weaviate
[services.weaviate]
command = "weaviate --host 0.0.0.0 --port 8080 --scheme http"
For ollama serve, it looks like:
# Start Ollama
[services.ollama]
command = "ollama serve"
But for verba start, it’s a little different.
# Start Verba
[services.verba]
command = """
if [[ "$WEAVIATE_URL_VERBA" != "" ]]; then
  until curl -s "$WEAVIATE_URL_VERBA"; do
    echo "waiting for weaviate ..."
    sleep 0.1
  done
fi

$PYTHON_DIR/bin/verba start --host 0.0.0.0
"""
In this case, we need to wait for weaviate to start up and become available, so we create logic telling Flox to poll the WEAVIATE_URL_VERBA URL (defined in our manifest’s [vars] section) until it gets a valid response. Once weaviate is up and running, Flox spins up the verba service using the verba start --host 0.0.0.0 command. This makes it accessible via its default port on all local network interfaces.
But we’re not done, because we also need some models for our LLM! We can even create a Flox service for doing this:
[services.models]
command = """
until ollama list; do
  sleep 1
done

ollama pull "$OLLAMA_MODEL"
ollama pull "$OLLAMA_EMBED_MODEL"
"""
The bash logic above instructs Flox to continuously run the ollama list sub-command, polling for ollama serve. A valid response indicates that ollama serve is online and ready, at which point Flox runs ollama pull to download the default foundation (llama3) and embeddings (mxbai-embed-large) models for our stack.
That concludes the walk-through of the Verba RAG stack’s components and internals.
Let’s pivot to how it works in practice!
Your Verba RAG Stack in Action
Let's start the stack and follow the logs for pulling the models:
flox activate -s
  # -s is short for --start-services
flox services logs models --follow
In Flox’s implementation of the RAG pattern, we take a corpus of documents and feed them into mxbai-embed-large—a high-performance text embedding model—which analyzes them and generates vector embeddings. We then store these embeddings in Weaviate. Whenever a user prompts llama3, we invoke mxbai-embed-large as part of the workflow, using it to convert the user’s prompt into an embedding. Comparing embeddings lets us retrieve relevant, factual documents, which we use to enrich the user’s prompt. The enriched prompt then gets fed into llama3, which is constrained to use only the information retrieved from the relevant documents.
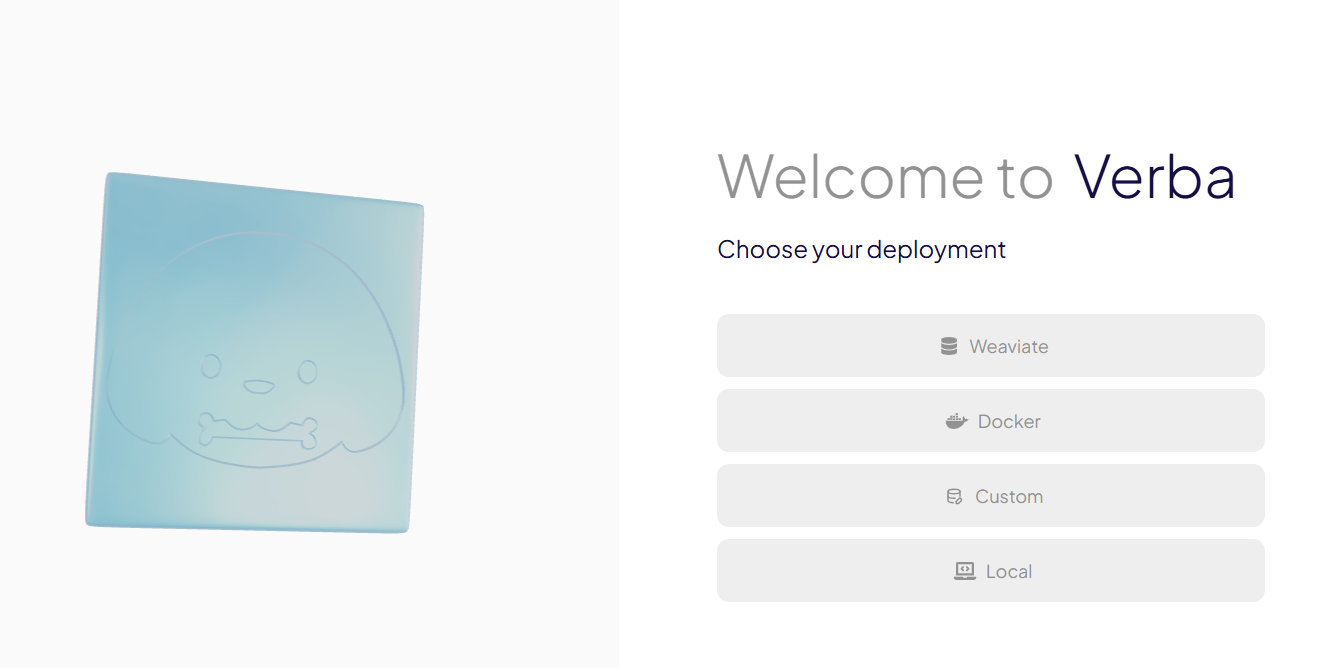
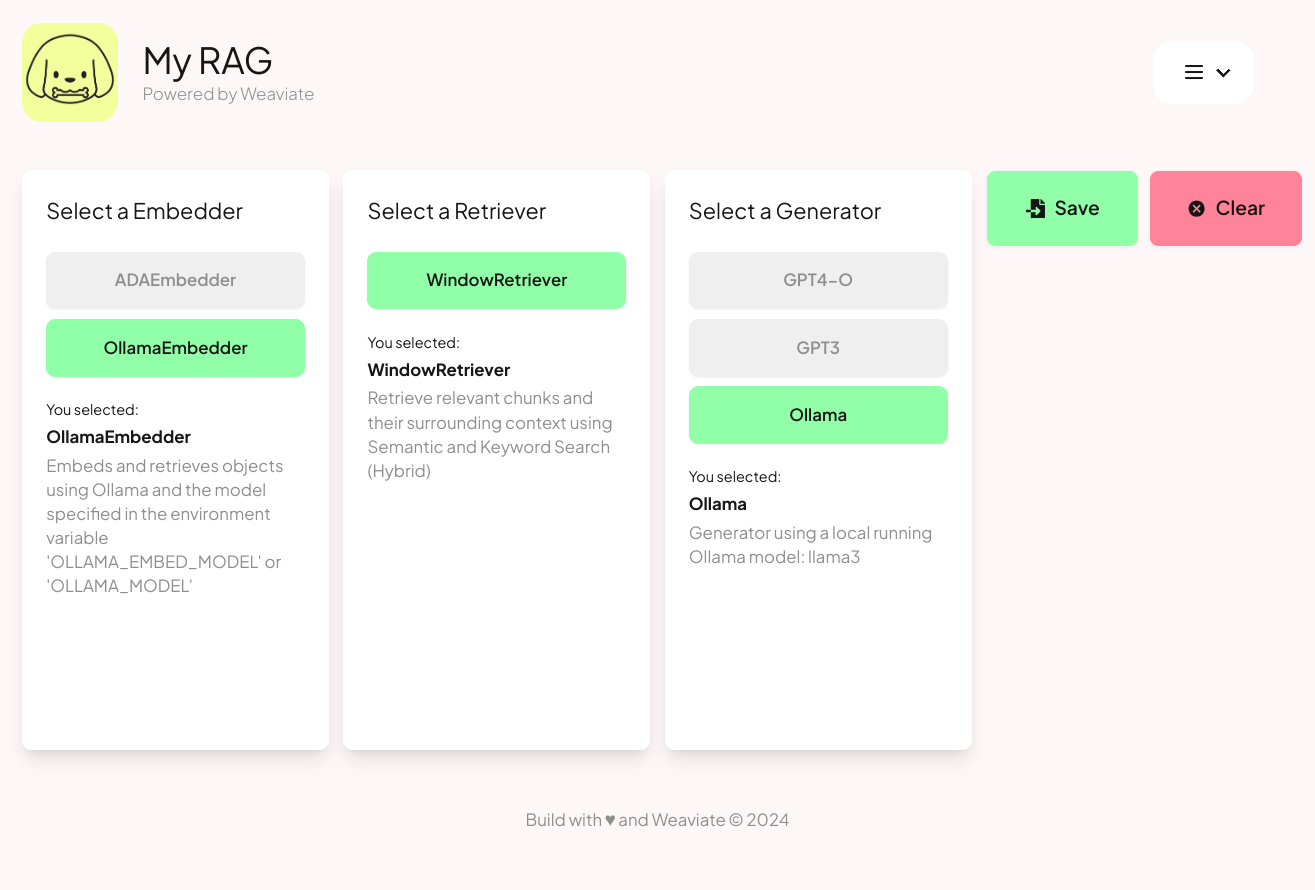
To get started with Verba, fire up your Web browser and point it to port 8000 on your localhost. Click the "Custom" button...
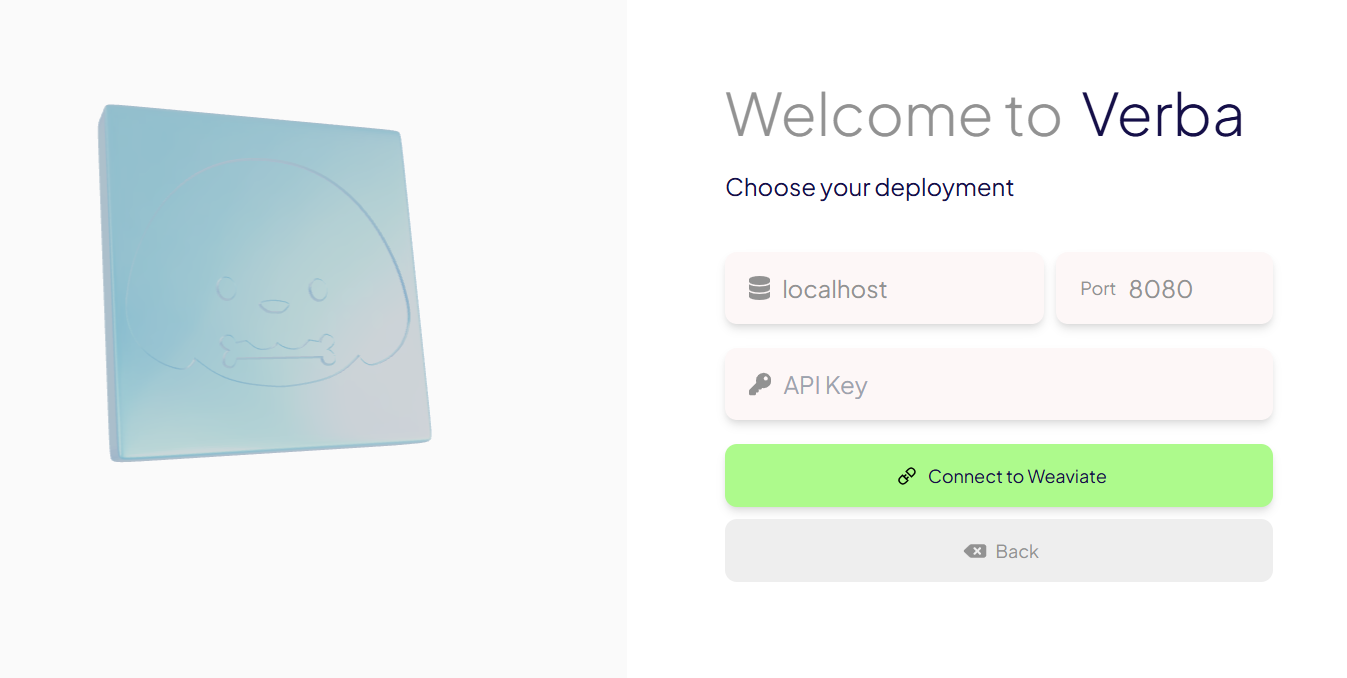
...and accept the defaults in the configuration menu:
You can use the drop-down menu to configure your RAG pattern’s settings, add documents, search through documents, and perform other tasks. (If you’re using Verba on a large enough screen, this menu is replaced by descriptive clickable buttons.)

Let’s say you’re creating a RAG conversational agent that your SREs can use to troubleshoot issues with Kubernetes (K8s). You could start by cloning the GitHub repo for the official K8s documentation website, but you’d then have to wrangle this documentation into integrated, relevant, and topical document groupings, and feed those into Verba.
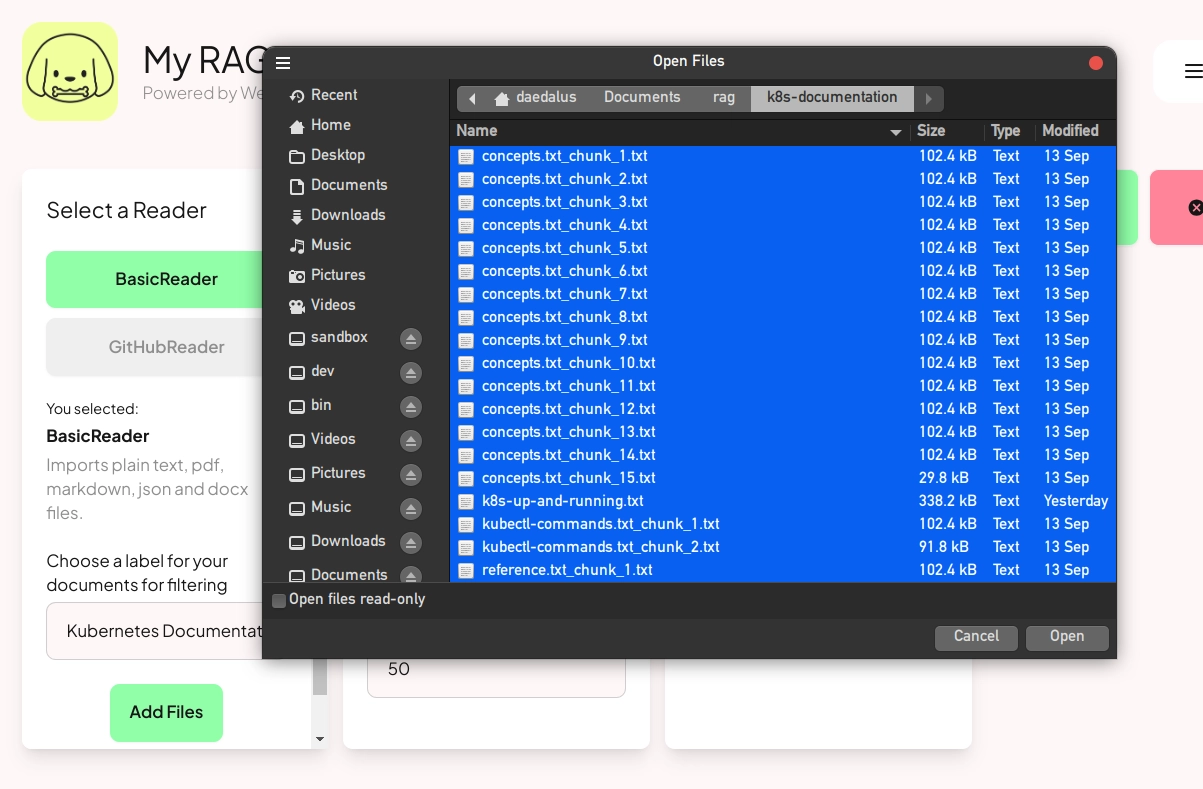
That would take quite a bit of data prep! So for this walk-through, we're going to cheat, using a GitHub repo that collects all of the K8s documentation into topical PDFs. Verba accepts PDFs as input, so you can feed them in directly, or you can do what I did: convert these into .txt files, then import them into Verba.
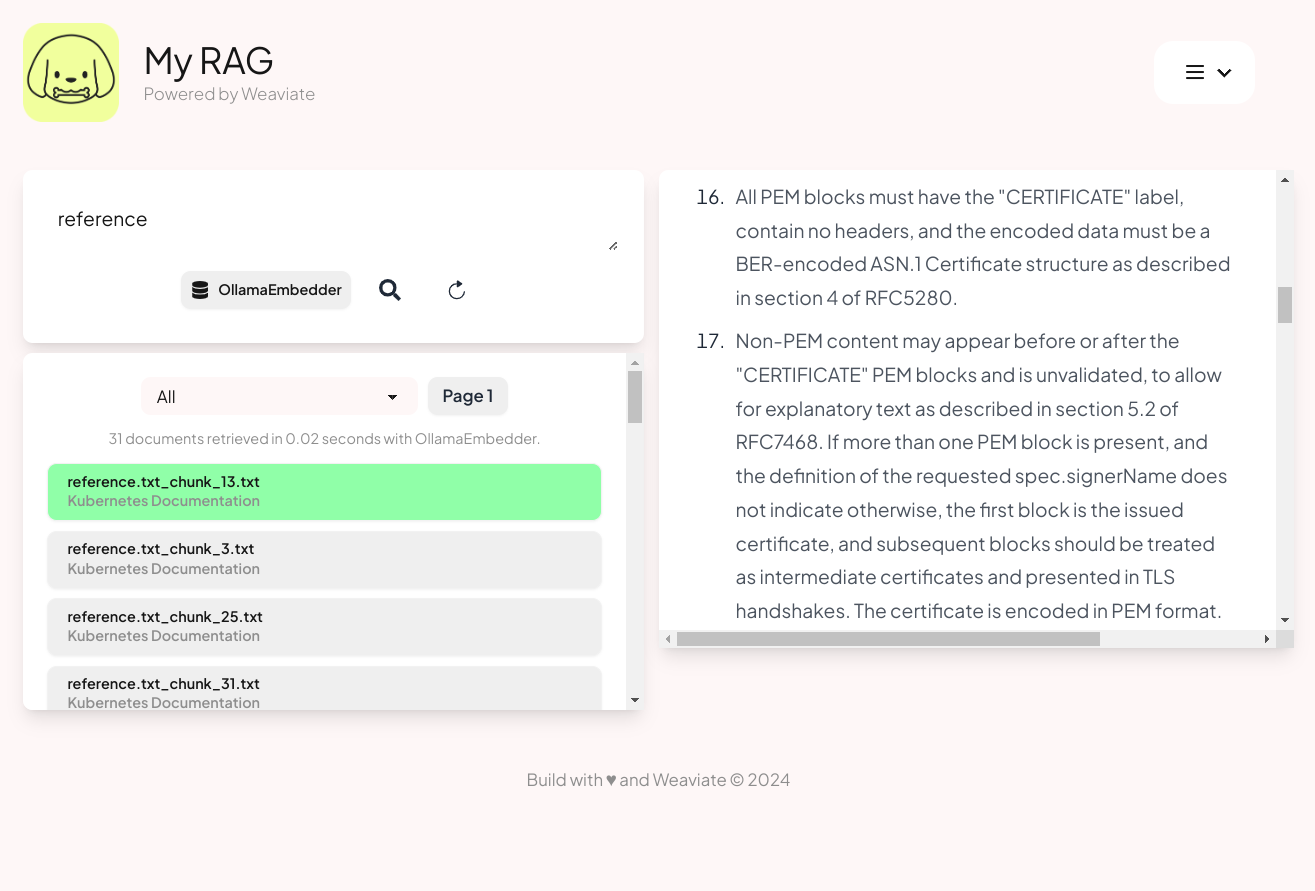
Once finished, you can click Verba's Documents tab to search or scroll through the texts you’ve imported. In the screengrab below, searching using the keyword “reference” returns a list of all documents that have this string in their titles. (Each of these files is a chunk of the “Reference” section of the Kubernetes documentation.) You can navigate this in the Verba UI’s left-side pane. The right-side pane shows the text of a selected document.
Clicking the Config tab in the right-hand side of the Import Data wizard lets you specify which embedding (for extracting vector embeddings) and generator (for LLM prompting) you want to use. Ollama is configured by default.
Once you’ve done that, you’re ready to begin grilling your Verba RAG! Let’s start with a simple question.
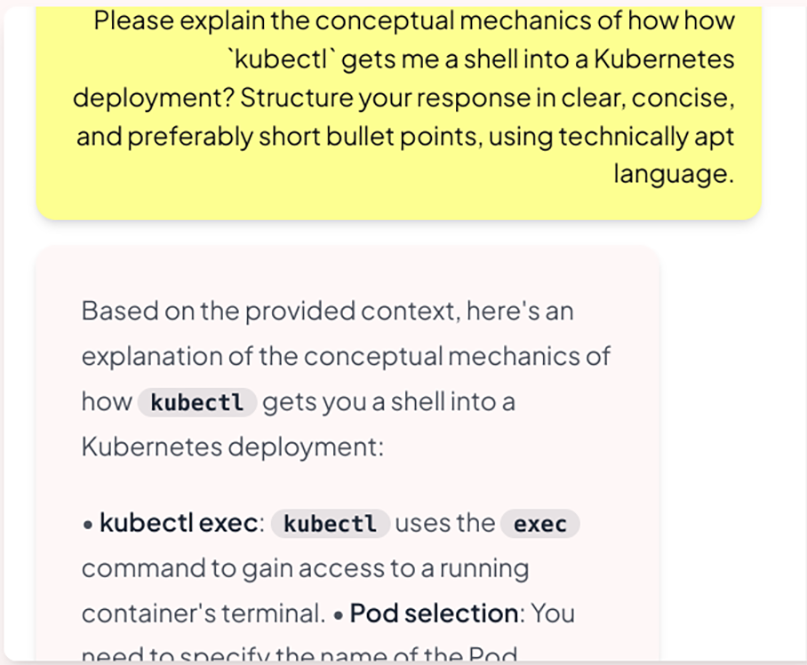
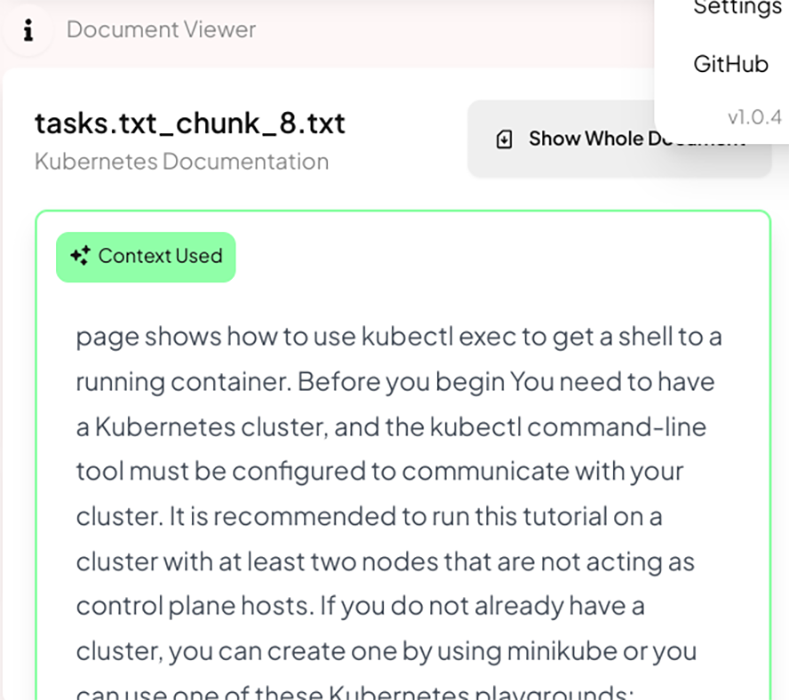
And here's the Verba context window, which shows the document the model uses to generate the response:
To give you a sense of just how much contextual detail a Verba RAG can provide, the code block below shows the complete output of a question and response:
**[question]**
in a highly constrained kubernetes cluster, how would you configure pod priority and preemption to ensure critical system pods can run while non-critical pods are evicted? also, what are the potential pratfalls when configuring pod priority, and how can you avoid them?


**[response]**
To configure pod priority and preemption in a highly constrained cluster to ensure critical system pods can run while non-critical pods are evicted, follow these steps:

-  Mark critical system pods as critical by setting the **priorityClassName** field to either system-cluster-critical or system-node-critical. This ensures that these pods will not be evicted unless absolutely necessary.

-  Set the priority of critical system pods to a higher value than non-critical pods. This can be done by setting the priority field in the pod specification.

-  Ensure that non-critical pods are configured with lower priority values than critical system pods.


To avoid potential pitfalls when configuring pod priority, keep the following in mind:

-  Be cautious when setting high priority values for pods, as this can cause unintended preemption of other pods. Double-check your configuration to ensure that high-priority pods are truly critical.

-  Avoid accidentally setting a high-priority value for a non-critical pod by mistake. This can lead to unnecessary preemption and disruptions in the cluster.


To mitigate these potential pitfalls:

-  Verify the priority values for all pods in your cluster using `kubectl get pod <pod_name> -o yaml` or `kubectl describe pod <pod_name>` commands.

-  Use the **priorityClassName** field instead of setting an explicit priority value to avoid mistakes. This way, you can ensure that critical system pods are prioritized correctly without risking unintended consequences.


By following these best practices and being mindful of potential pitfalls, you can effectively configure pod priority and preemption in a highly constrained cluster to ensure critical system pods run while non-critical pods are evicted.
You can use any generative model that Ollama supports with Verba.
We’ve been using llama3, but let’s switch to a much smaller model, phi3.5, to see what kind of difference it makes. Because while llama3 runs at about the same speed as GPT 4o; phi3.5 is significantly faster. To swap foundation models in Flox, run flox edit and change the OLLAMA_MODEL variable in the vars section of manifest.toml, replacing llama3 with phi3. Then start the models service with Flox to pull it into ollama:
flox services start models
flox services logs models --follow
Now our model is up to date.
The code block below shows the output of Verba’s context-enriched response with Phi3.
**[question]**
explain how the **Immediate** and **WaitForFirstConsumer** binding modes (in persistent volumes) differ from one another.


**[response]**
-  Persistent Volumes can be immediately bound to a request (**Immediate** Mode) or wait for consumer requests before binding. Immediate mode does not respect existing PVs unless there are no suitable ones available when needed and the node has appropriate affinity settings; it may lead to overprovisioning as resources aren't reserved specifically until they’re actually used by a Pod (e.g., nfs volumes without prior configuration).


-  **WaitForFirstConsumer** mode ensures that only one consumer can bind at any given time, promoting efficient use of shared local volumes and minimizing resource wastage as it aligns with actual usage patterns while considering other scheduling constraints like CPU/memory needs.


-  When using **Immediate** Mode for NFS or without external static provisioners configured in your cluster (e.g., local **StorageClass**), you may face challenges unless there's an immediate need and no suitable PV, as it does not manage the lifecycle of shared directories beyond simply binding requests to existing ones when possible; this could result in unpredictability without proper pre-configuration for resource management (e.g., creating a local volume with default settings beforehand).


-  **Immediate** mode can bypass node affinity preferences, while **WaitForFirstConsumer** respects them and does not attempt to bind if the node is deemed non-appropriate due to these policies; this behavior directly influences resource utilization strategies in managing a Kubernetes cluster's resources effectively.
That’s basically it. Verba gives you just about as turn-key a RAG stack as you could ask for. It’s 90 percent of the way there. Flox gives you that extra 10 percent, with the added bonus of making it easier to install, configure, and run Ollama, giving you a way to run a full version of the Weaviate vector database, and—not least!—enabling you to run this environment anywhere.
Gods from Machines
Verba makes it as easy to spin up a local RAG as Ollama makes it to run a local LLM. Both projects seem like dii ex machinis, radically simplifying something that—six months ago—seemed hopelessly complex.
Flox does something similar with dev environments. Creating and sharing reproducible dev environments is notoriously difficult, but Flox provides a solution that’s scalable, performant, and reliable.
Try it yourself. Download Flox and pull our Verba example environment from FloxHub, customize it to suit your needs, and then share it with your friends—either by git push-ing it to GitHub or flox push-ing it to FloxHub. Sharing via FloxHub is as easy as:
flox pull flox/verbaWhen co-workers, friends, or customers git clone or flox pull --copy this environment, it runs exactly the same everywhere—on Mac, Linux, or Windows (with WSL2) laptops, or on containers and VMs in CI and prod.
If you’re intrigued, why not check out the quick start for an overview of how Flox fits into your workflow in fewer than five minutes!