Clone the sample project
We’ve prepared a sample project for you, but you’ll need to install Flox to follow along. Once you have Flox, you can clone the project:Activate and explore
Runflox activate to enter the environment. This will make all of the packages defined in the environment available in your shell:
flox activate made it available automatically. To get started on any project with Flox, all you need is git clone and flox activate.
Now let’s see what else is installed to the environment with the flox list command:
nasm. Flox is language agnostic, so you can manage your entire stack of developer tools in one place. Anyone who runs flox activate on this project will get the exact same set of packages.
Managing packages
Flox makes it easy to search for, inspect, and install packages from the Flox Catalog. Useflox search to find packages. For example, to search for ripgrep:
flox show:
Push to FloxHub
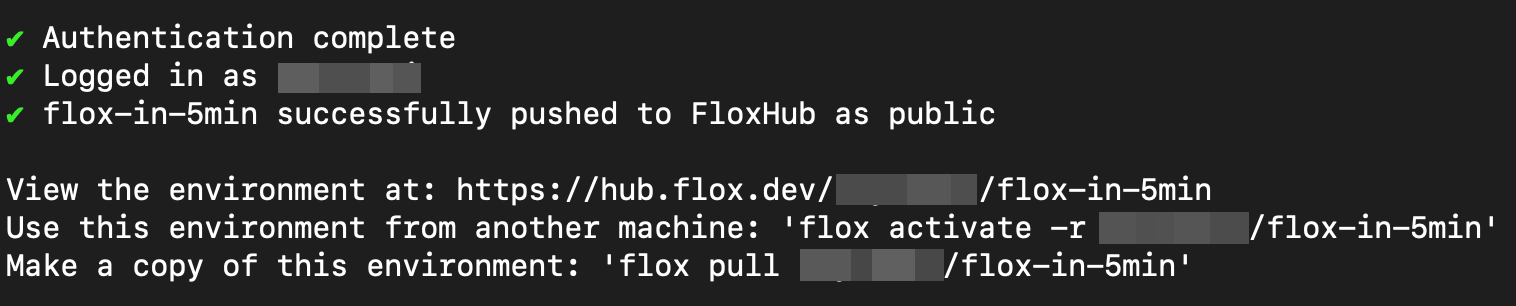
Now that you’ve made changes to the environment, share it with your team by pushing it to FloxHub. FloxHub is a platform for sharing and discovering Flox environments and packages, making it easy for your team to stay in sync. If you haven’t already, sign up for a FloxHub account. Then authenticate with the CLI: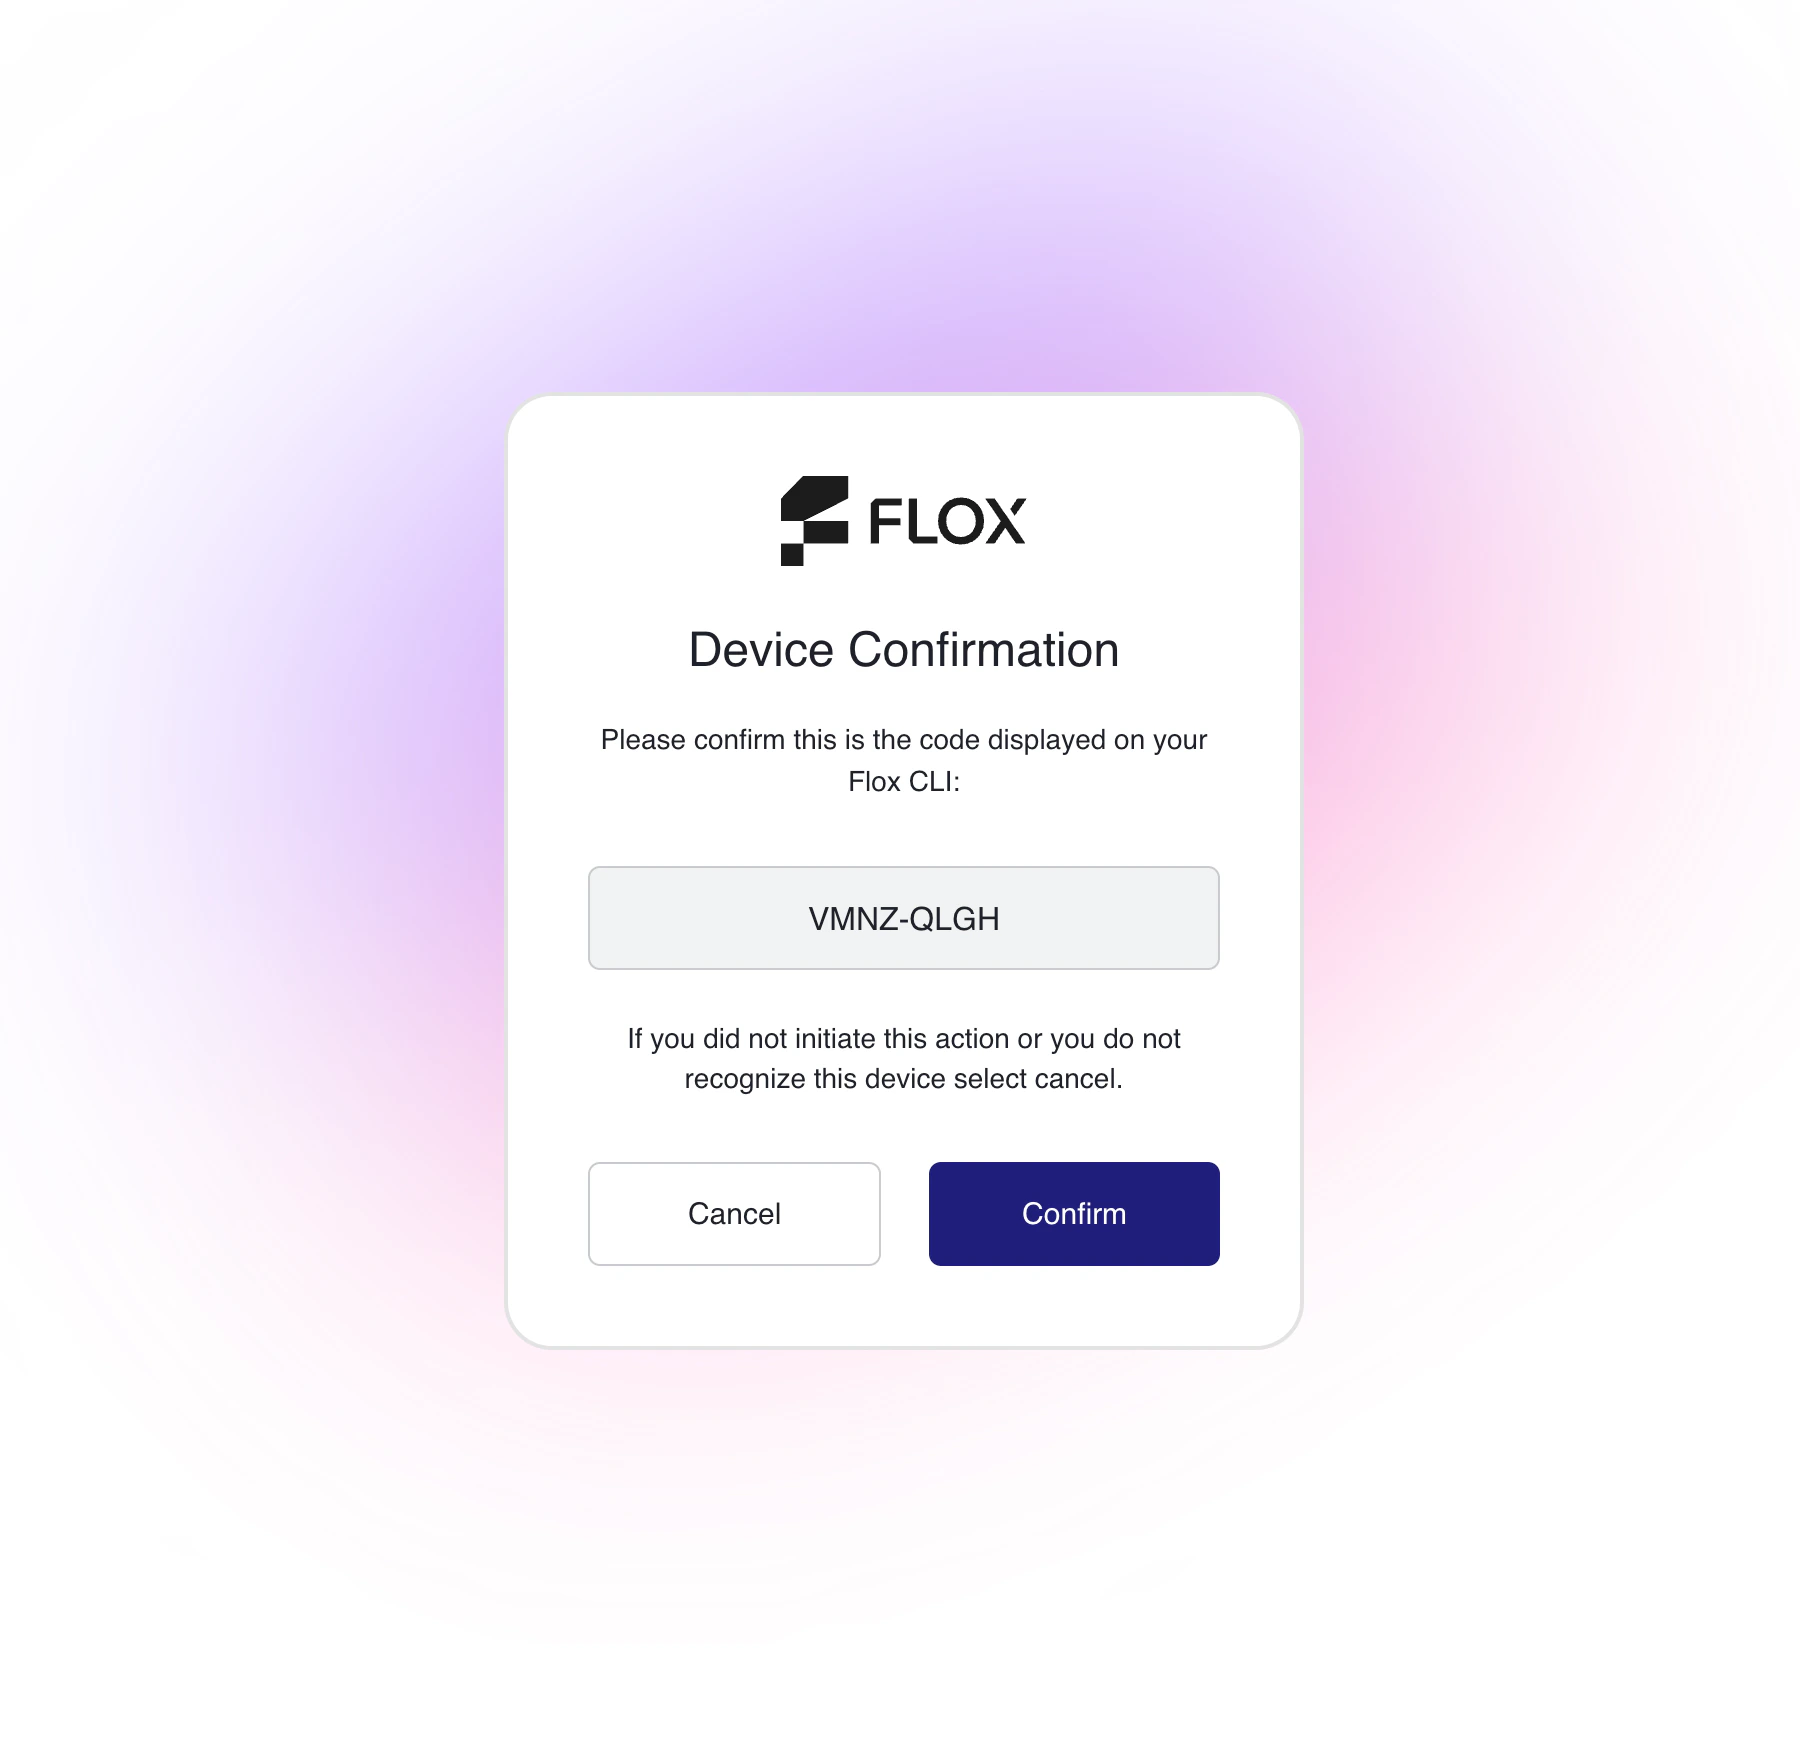
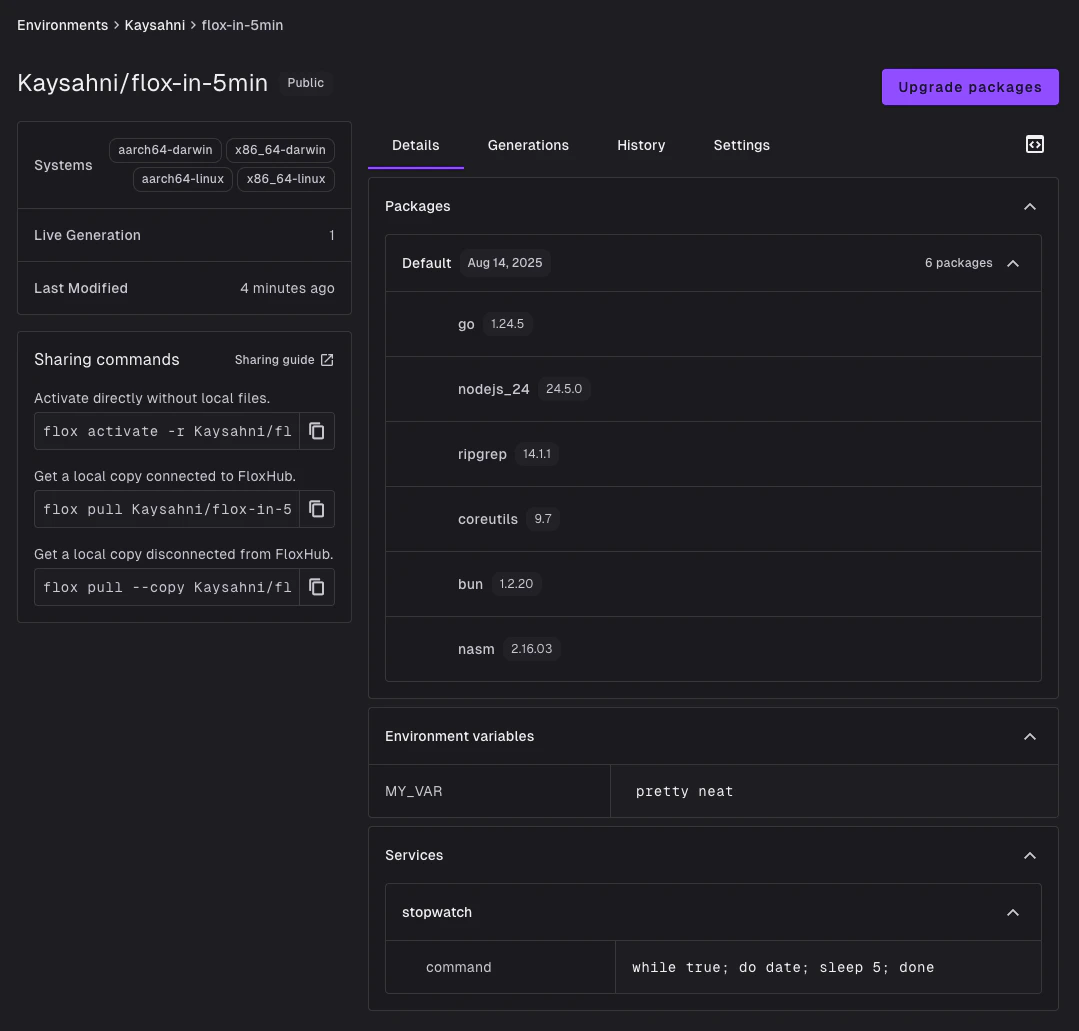
Services
Most projects need more than just packages. You might need a web server, a database, or a background worker running alongside your code. Flox handles this through the[services] section of the manifest.
The sample environment includes a simple stopwatch service. Start it up:
Ctrl-C to stop watching the logs. When you’re done, stop the service:
flox activate -s.
What’s next?
You’ve created an environment, installed packages, pushed to FloxHub, and ran services. Here are some next steps to keep going:- Customize your shell environment with aliases, scripts, and hooks
- Design cross platform environments that work on both macOS and Linux
- Reuse and combine environments to build modular developer toolchains
- Run Flox in CI for consistent builds across your pipeline
- Build and publish packages with Flox